Tuesday, February 19, 2008

Back to Juliano

We had a series of lectures by Juan Martinez over the weekend on painting materials, the Munsell Colour System, and the French academic tradition (and where we fit in). I'll be posting the list of recommended materials later. Here though is the latest Juliano. I have been modelling the cheeks and the neck. Now the hair is standing out like a clown's wig. I'll be getting to that next.


Sunday, February 17, 2008

Silverpoint Workshop Feb 11-14

I took a break from painting this week to take a workshop in Silverpoint at the Academy of Realist Art (with instructor Ryan Gauvin).

Silverpoint (or metalpoint) is an old method of drawing using a stick of silver sharpened to a point and held in a lead holder. A Renaissance technique, it was used as a drawing medium for studies. By the 17th century, its use became increasingly rare as graphite become more readily available.

Below is a sample from my first piece, a copy of a Raphael drawing. The intention was to follow build up the drawiing slowly, following the lines of the artist. Unlike graphite, you cannot erase the silverpoint markings (although apparently you can sand the surface down to make them disappear, but this harms the paper). Here is the process we followed:
  1. Ryan prepared watercolour paper for us that had been coated several times with Golden Acrylic Gesso. It was sanded down to make a smooth finish. The idea is to prepare a surface that the silverpoint can scratch a line onto. This will work with gold too.

  2. We traced a few lines of an existing drawing with Mylar tracing paper with a thin graphite pencil and then went over them again with a black marker so they would show up.

  3. On a light table, I placed the treated paper over the tracing paper and re-traced the outline with a graphite pencil. You can use the silverpoint but if you're not careful, you can cut too deeply and not be able to erase later.

  4. Back on the stool, I got to work using a series of long strokes to build up values and follow the direction of the lines (bottom left to top right for a right-handed person; bottom right to top left for a left-handed person).

  5. I turned the board constantly to get the right angle. The lines have to be drawn in parallel. You also can't stop in the middle of a line and pick up later...

  6. The last step, which I haven't done yet, is to tint the paper.... Normally, Ryan would tint the paper with acrylic before starting the drawing. But there are advantages of doing it later. If you go too dark with the silverpoint, then a tint after the fact will take some of the excess value away.

Wednesday, February 6, 2008

Continue Modelling the Face


This week, I concentrated on shaping the cheeks and chin, trying to lighten things up where required and keep the values neutral.

Sunday, January 27, 2008

Changing Brushes

-- Apologies in Advance -- my camera lens was smudged when I took this picture.
This week, I picked up a few more tips:
  1. I was advised to exchange my bristle brushes for softer brushes to get a smoother finish (the bristles brushes were scraping the paint as I applied it). Today I bought some soft synthetics -- filberts and rounds.
  2. I also learned to stop using the mineral spirits to dilute the paint. Apparently at the First Painting stage it's important to lay down a strong foundation.
  3. Hair Conditioner can be applied to brush tips at the end of a session to preserve their shape!

Saturday, January 19, 2008

First Painting > Correcting the eyes

I spent this week immersed in first painting, and trying to recapture the drawing lost during big form modelling. The cast's right eye was beginning to drift away from the centre. At first the best solution seemed to be to paint over the entire eye and then repaint it again rather than trying to move tiny shapes one at a time. However, after measuring against the other eye, the fix required was in the smaller shapes, beginning with the lower lid. I just had to rotate downward from the right corner of the eye to put it more on a slant and make the eyeball itself narrow. It's now in a better position relative to the left eye of the cast (or the right eye in the photograph).

Other things to work on: temperature correction. I haven't been mixing enough raw umber into the mix. The face is looking bluish. The neck is the right neutral value.... Here's the lesson to be learned. As a tint, ivory black is more powerful than raw umber. To keep a value neutral, there has to be more raw umber in it than black, otherwise the black dominates and gives the colour a cool temperature.

I also must work on the forms on the face and not sculpt before first putting in the planes of the form (see nose). I will remember that the chin itself has about 5 planes. These should be placed first...


Tuesday, January 15, 2008

On Saturday Jan 13, I started the first painting stage. I'm trying hard to get back the accuracy I think I achieved in the dry brush stage. I started with the eyes and began working down and out. I left off with the nose. The camera is distorting things here--it makes the canvas seem closer and the painted image larger, and yet, they are on the same plane...

Sunday, January 6, 2008

Belvedere Torso

Work continues on the red chalk version of the Belvedere Torso. I took the drawing with me to Mexico for the holidays and worked on it at the beach! I still need to finish the neck and base area, and then return to drawing with a fine brush to smooth over the transitions from light to dark. I might apply a darker red chalk to highlight the darkest darks.
Information about the Belvedere Torso statue can be found here: http://en.wikipedia.org/wiki/Belvedere_Torso

Wednesday, December 12, 2007

Big form modelling on Juliano


This week, I repainted the background, the cast shadow, and the contained shadows in the neck, hair and eye sockets... While I had a good neutral mixture on my pallete, I attempted to reapply the big form modelling on the lower half of the face. It looks better, but there's too much transition, so I will be cutting it back. I also need to remix the titanium white and start at the top of the forehead and work out again. On my first attempt, I preserved some of the dry brush work in the hair but now these marks have to be painted over to make the top of the hair one solid mass.

After this, "first painting" will be the next stage.

Sunday, December 2, 2007

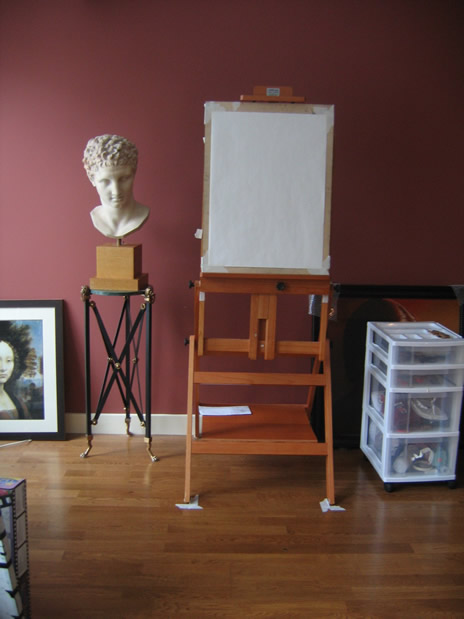
Set up for Mercury


Studio setup: Mercury is now on his stand in position, with north light.
The easel looks lopsided but the drawing board itself is level.
Positions are marked with tape.

Juliano's 5 o'clock shadow


Here I made a first attempt at big form modelling. Much more work is needed to get the forms turning.
First I prepared the pallete. I created one column of decreasing values mixing black and white. Then I created a second column of matching values with raw umber and white. To create neutral value (neither cold nor warm), I mixed the pairs of values together and started applying them to the face.

I started working from the jaw upwards, creating short vertical strokes with a wide brush. When I reached the cheek, I stopped. Then I mixed calcium carbonate with the Titanium white and applied that on the top of the forehead pushing out. As I worked down to the cheek, I added increasing amounts of the lighter values to the pure white.